I love chocolate. It’s soul food. Brain food. During my uni exams, I would eat a 250g block of chocolate each day, which may not seem so bad – until I reveal the fact that I had five exams in consecutive days at the end of first year.
I make chilli chocolate bark by ‘tempering’ 300g of good dark chocolate (50-70% cocoa; ‘temper’ by melting, cooling slightly, adding more chocolate, remelting), adding a teaspoon of chilli powder together, then spreading a thin layer onto aluminium foil. Maybe I have just been lucky, but the fabulously delicious end result is glossy and snappy and gloriously good.
[Addendum: before I get myself offside with every (budding) chocolatier in the world, note that I am really keen to learn how to temper chocolate properly, as I am aware that mindful work makes a huge difference. Fortuitously, April’s Gourmet Traveller tells me how to do this.]
I recently stumbled onto raw cacao beans in my local health food store. I bought them and was overtaken by an unnatural determination to make my own chocolate from scratch. So I set out on a surfing expedition. The international network revealed some interesting resources, including sites extolling the virtues of raw cacao and an inventor’s DIY-chocolate blog [18 June 2018: http://www.waynesthisandthat.com/makingchocolateathome is, sadly, now defunct].
I was excited when I discovered the passionately informative Chocolate Alchemy, which told me that my fair trade beans were of the top notch criollo variety. This site provides a step-by-step guide to making your own chocolate from scratch. Reading through the roasting, cracking & winnowing and grinding processes, I felt like this adventure would be a piece of (chocolate) cake. Then I got to the ‘conching & refining’ notes and researched the recommended equipment, a Spectra (formerly Santha) wet grinder — not something I have the dollars or storage space for right now.
Was there another way? I could not see one, and finding out could be an expensive exercise. In any case, I had the beans. So I roasted half the packet at 150°C for about half an hour. I then spent about the same amount of time peeling the husks from the beans, then cracking the nibs (huskless beans) in my mortar & pestle, before winnowing (ie. blowing away the membranes with a hairdryer on low as I poured the nibs from one bowl to another, a technique that worked remarkably well).
What I ended up with was a pure chocolate delight: the nibs were pleasantly bitter. For a few days, I nibbled on them occasionally, patting myself on the back for a decent roasting effort, all the while knowing there was more work to be done. I would turn my nibs into truffles.
Recipe #31: Chocolate truffles. Makes 60+ truffles.
You will need:
• 1kg dark chocolate
• 200mL cream
• 1 standard-sized (~20cm diameter) cake [I used a chocolate mudcake, purchased at day-end so it was discounted…]
• 30-60mL of your favourite spirit [eg. Cointreau, Kahlua, Grand Marnier – or leave this out altogether if cooking for kids :)]
• 1 small cube butter – ~1cm³
• (optional) 75g roasted cacao nibs, crushed [or you could use your favourite crushed nut. Macadamias or brazil nuts would be awesome]
First, make the chocolate ganache. Place 375g of the chocolate into a large heat-proof bowl. Heat the cream to steaming (don’t boil it) and pour it over the chocolate. Leave for a few minutes, then stir with a metal spoon. Don’t be worried if it looks too creamy/bitty at first – it will emulsify, trust me! When you have an even-coloured chocolate pool in from of you, it’s done. Now allow your ganache to cool.
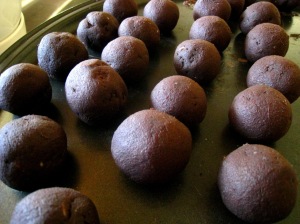
To finish the truffle filling, break the cake into the ganache. Measure in the spirits and mix evenly with your hands. Once this is done, roll the mix into little balls (use about 1 tsp of mix per ball). This bit is optional: press the balls in a bowl of the crushed cacao nibs [the extra layer also makes it easier to coat the balls in chocolate]. Place the balls on a tray in the refrigerator for at least half an hour.
>If the balls start to flatten as soon as they are placed on the tray, this is a sign that you may have added too much of your favourite spirit 🙂 Recover by putting the mix in the fridge for half an hour, then start rolling again.
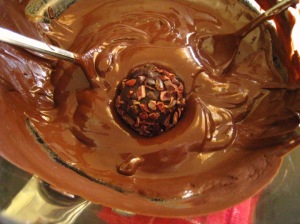
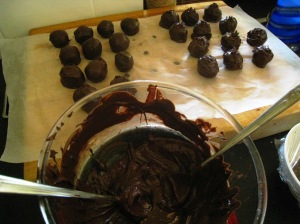
To choc-coat the truffles, heat the remaining chocolate with the butter in a double-boiler over the stove. Or you can use my set-up: glass bowl over a small saucepan with about an inch of hot water in the bottom; saucepan on the stove over low heat (note that you want the water to be hot rather than boiling). When melting chocolate, stir continuously to prevent it from seizing and, if you notice steam coming from underneath, stir the set-up off the stove for a minute and then replace (drops of water cause chocolate to seize too). Once the chocolate is melted and smooth, it is ready for coating.
I use two parfait spoons for this:
- Place a ball in the melted chocolate;
- Ensure it is completely covered;
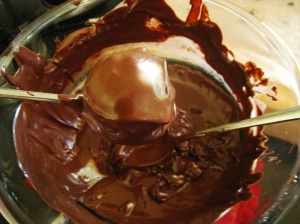
- Lift the ball from the bowl with one spoon and shake excess chocolate off the 2nd spoon;
- Roll the ball onto the 2nd spoon and encourage excess chocolate of that spoon with the 1st spoon; and
- Place the truffle on grease-proof paper, trying not to leave too much of a foot (the extra bit of chocolate under a truffle).
As each truffle is complete, rest it on a piece of greaseproof paper until set. You can sprinkle over some crushed cacao nibs if you like – I do this to differentiate between the truffles rolled in cacao vs those I leave naked.
Leftover melted chocolate? No worries. Flick it over a piece of greaseproof paper to make decorative shards for desserts.
Other variations you may want to try:
- chilli chocolate – add a heaped tsp chilli powder instead of the spirits;
- adding a whole hazelnut – form the truffle ball around the hazelnut;
- adding a cherry – form the truffle ball around a glace cherry. You may want to soak the cherries in kirsch or Cointreau first;
- roll the naked truffles (ie. minus cacao nibs) in fair trade cocoa powder rather than choc-coating them; or
- what else can you think of? There must be a million other combinations out there.
If you do not attempt any other recipe from my blog, please try these. Although they take a little time, they are super-simple, incredibly edible and guaranteed to melt the toughest hearts.
Breaking news: now that I have a Thermomix, I am asway with the possibilities it holds for amateur chocolate-making. Stay tuned for Part 2 of this epic adventure…
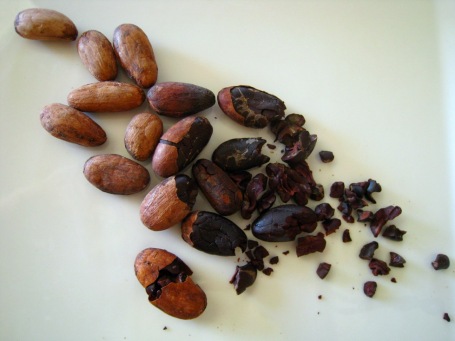
Anatomy of a cacao bean:
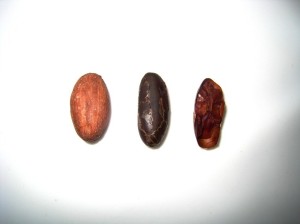
The peeled beans:
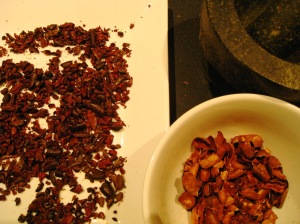
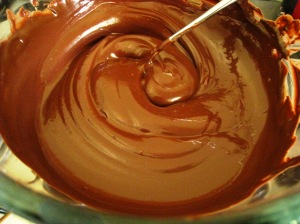
The melting pot:
Naked truffles:
Coated in cacao nibs:
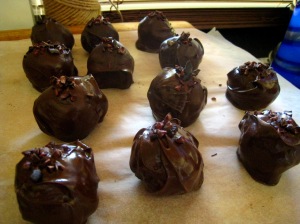
Dunked in chocolate:
then…
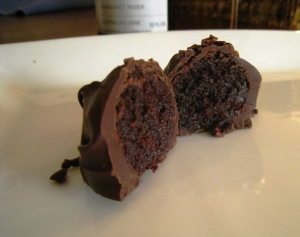
The finished product:

Please tell me this is calorie free, for even reading it is tightening my belt!
-Bill
LikeLike
Bill, the truffles are absolutely calorie-free if:
(1) shared – in which case, the calories stick to the plate of origin; or
(2) the truffles are cut into pieces – give them an extra shake before eating just to make sure all the calories have fallen out.
H 🙂
LikeLike
Ahhh, nice to know the secret behind this as I had heard the preparer accepts all responsibility for calories as they incur them in the first instance yet it just pays to be sure!
– Bill
LikeLike
Definitely! If I subscribed to the notion that “preparer accepts all responsibility”, I would be roughly house-sized.
H 🙂
LikeLike
Thank you so much for reading my birth story! I’m happy to share 🙂
LikeLike
Yum, they look delicious Hannah, thanks for sharing.
LikeLike
Hannah, I love your picture of cacao beans! Do you think I could use it on my website, too?
Let me know!
Thanks!
daniela
danielatanner@yahoo.com
LikeLike
Thanks for your comment, Daniela! I am happy for you to use an image from my site – so long as you attribute it to me, and let me know where to find it in a follow-up comment.
H 🙂
LikeLike
I soooooooooooooooooooooo have to make these again.
I took them to a number of social functions and EVERYONE commented on how delish they are!!!!!
LikeLike
I’m glad these worked out so well for you, Tanya! Have you tried making the raw goji berry chocolate yet?
H 🙂
LikeLike
Lately I had some coffee cake over bake…and chocolate cake truffles were created…all thanks to this idea of yours. Tried it first before coming to comment on your blog.
Thanks for the inspiration ;o)
Flavourful wishes,
Claudia
LikeLike
Thanks so much for the feedback, Foodessa! I am so glad you had a good experience with this recipe, which remains a firm favourite amongst my friends.
H 🙂
LikeLike
What can be substituted for the spirit to mix the cake in the ganache ?
LikeLike
Thanks for your question, Farayha!
You don’t have to add anything in place of the spirit if you don’t want to – or you could add a fruity/sugary syrup, like raspberry or spiced sugar syrup, for flavour and to make the centres moist and delectable.
H 🙂
LikeLike